


Shore fishing secrets: how to read the sea and choose where to cast
Before you ask "how far should I cast?", ask "what am I casting onto?" Learn to find the sandbar, the trough and the edge between them, and use moving water to choose a spot worth trying.
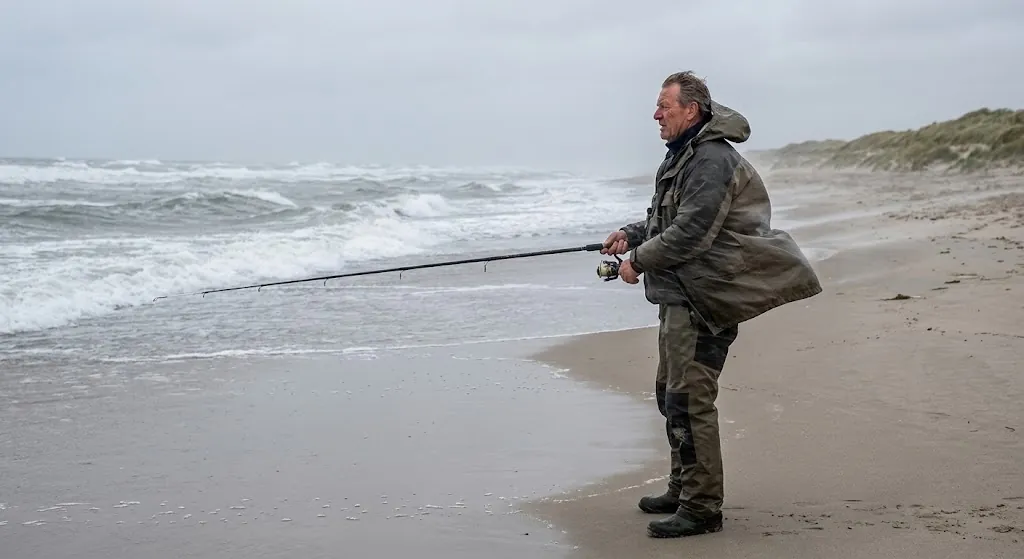
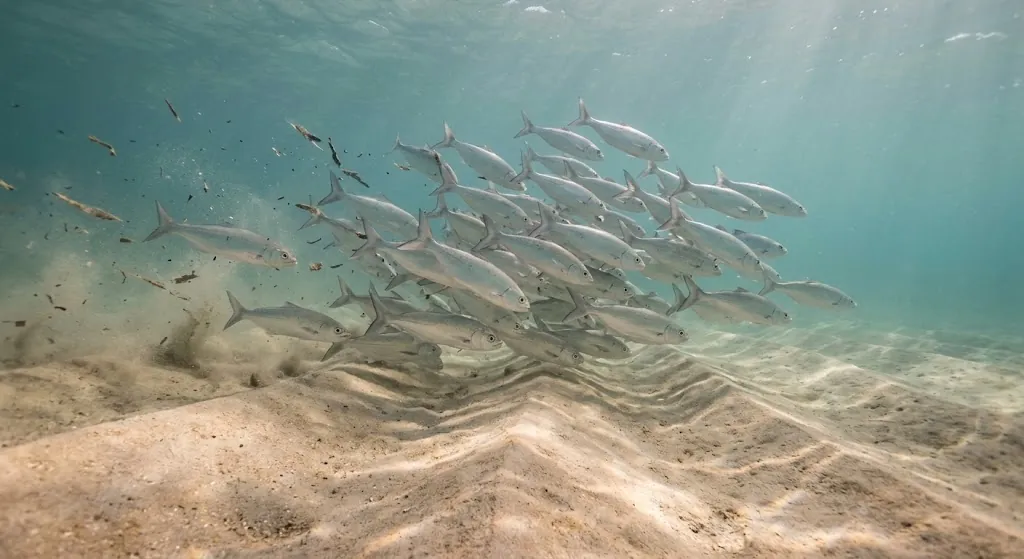
Shore fishing starts with watching the place and the water before you pick a casting spot. The photo shows the general scene; it cannot tell you the depth or whether the spot is safe.
You reach the beach, rig the rod and cast as far as you can. You wait, change the bait, cast even farther… and the bite you were waiting for never comes. Sometimes the problem is not the hook or the bait. It is that you are presenting the bait in water the fish are not using at that moment, while an edge or a channel much closer to your feet deserves a try.
An angler who knows his beach does not only see the surface. He tries to picture what lies beneath: where the sand rises, where it drops, and where the water flows. That reading will not show you where every fish is, but it turns random casting into choices based on observations.
In this guide we will walk through it step by step, as if we were standing on a sandy beach together. You will learn what the "bar" and the "trough" are, how to spot the edge, when to use wind and current, and how to test a spot yourself.
1. Understand the seabed: what are the bar and the trough?
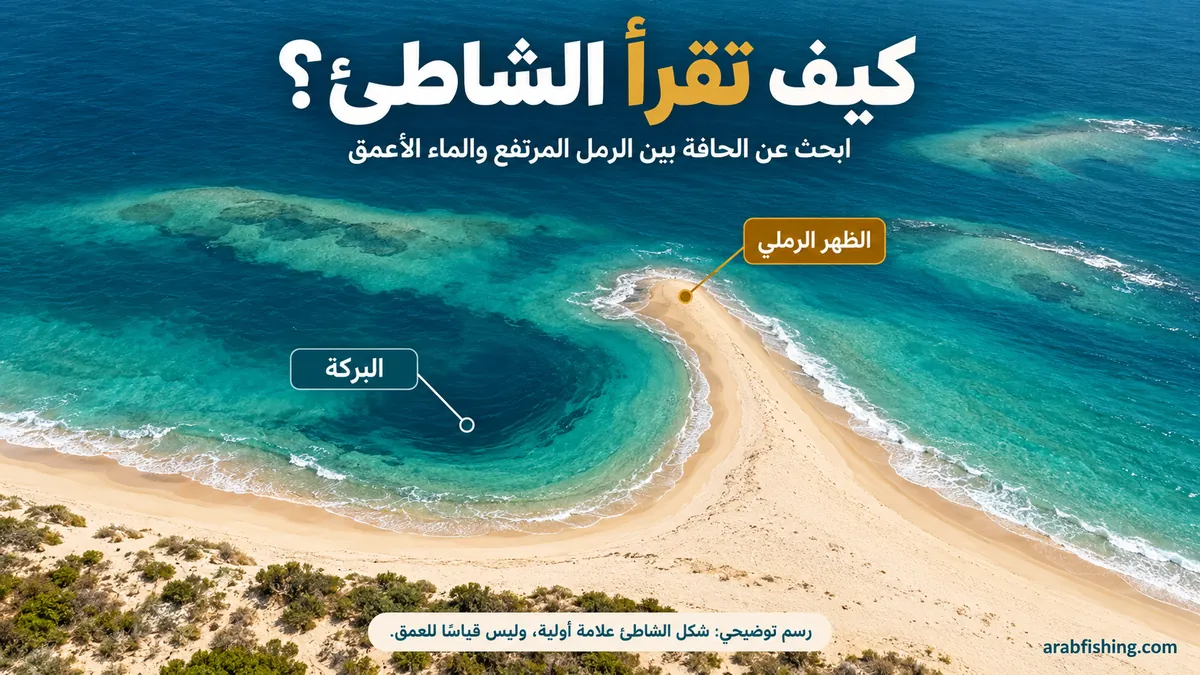
Names for these features vary between anglers and regions. Here we use "bar" for the relatively high sandy part under the water, or running out toward the sea, and "trough" for the lower, relatively deeper part beside it. What matters is a difference in seabed level, not necessarily a visible sand island or a closed pool.
The bar: relatively high sand
Imagine land with a low hill that has been covered by water. That rise is like a sandbar: there is less water over it than over some of the surrounding areas. It may run from the beach out to sea, or it may be a sand barrier parallel to the shore that never shows above the surface.
If you see sand sticking out along the shoreline, that is a sign worth checking. But it does not prove on its own that the rise continues underwater in the same direction; the shape of a beach is shaped by waves and moving sand, and the submerged terrain may differ from what you expect.
The trough: the low spot or deeper channel
You may see a curve where water enters between two protruding parts of sand, like the arc of a horseshoe. A trough can also be a long channel between the beach and a distant sandbar. The point is to look for a relative difference in depth, not a single shape that must repeat on every beach.
The edge: where the two levels meet
Between the high sand and the low there is a transition zone, which some anglers call the "drop-off" or "edge". The transition may be a gentle slope or may be more obvious at some spots. This zone deserves attention because it combines a change in depth with moving water, and small creatures and food may pass there for fish to use.
2. How to read the water even when the sea is "flat as oil"
When the sea calms and the waves drop, some of the signs that reveal differences in depth disappear. Now you need to collect more than one observation. Take a few minutes to watch from a high, safe spot on dry land, then compare what you see instead of relying on one signal.
Watch where the waves break
When there are waves, repeated breaking along a certain line can help you notice a shallow sandbar. A gap between the breaking zones may mean a difference in depth or a channel. But it can also be the place of a rip current, so never treat the area where waves do not break as a safe place to wade in.
Compare water colour with caution
Over pale sand, shallow water may look lighter than its surroundings, and deeper water may look darker. But shadows, weed, rocks and cloudiness change the colour too. Use colour together with the wave pattern and the visible bottom, and do not turn it into a final verdict.
Follow foam and floating material
Watch the natural foam: does it move along the shore? Does it gather at one point? Does it move out to sea? These are observations of surface movement, and the water near the bottom may move differently. Never throw litter into the water to test the current.
Use low water
If you visit when the water level is low, you may see sand or channels that were underwater on your last visit. Remember their positions relative to fixed landmarks on shore. When the water returns, use that knowledge as a starting point, remembering that a sandy bottom changes after storms and wave action.
3. Wind helps you choose… but moving water decides the test
Wind affects the cast, the line and the surface of the sea, but it is not the same as current. The wind may blow from the right while the water moves along the shore in another direction, and the current can change with the tide or be affected by the angle of the waves and the shape of the coast.
So there is no rule that always works, such as "stand with your back to the wind". It is better to choose a safe spot from which you can present the bait at the candidate edge and control it with the line, without drifting or repeated tangles.
What if the wind is from the side?
Watch where the line goes after the cast, and whether it bellies in the air in a big arc. Try changing the casting angle a little, or move to another side that lets you present the bait better. A sand spit or a point may change the water movement around it, but the calmer side is decided by what you actually see, not by whether it is left or right.
And if the line keeps being dragged away?
The cause may be a strong current, waves pushing on the line, or a weight that does not hold on this bottom. Before you add weight, check the casting-weight limit printed on your rod, and try another angle or distance. If you would need a weight beyond what your tackle can handle just to stay in place, change position or postpone fishing until conditions improve.

4. Where do you cast the bait? Understanding "thirds" in practice
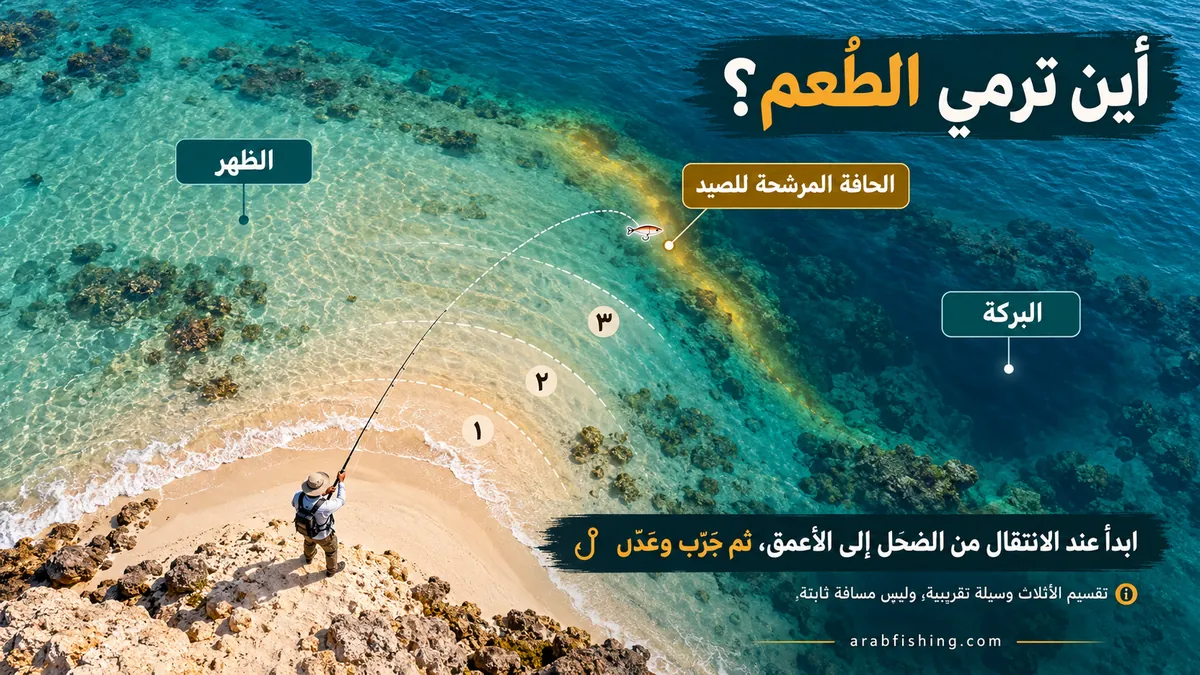
A common mistake is to make the farthest cast your goal every time. If the edge you are looking for is close, you may overshoot it and put the bait on a bottom that suits your target less.
Dividing the bar and trough into thirds is a mental way to simplify the idea: instead of aiming at the middle of one area, pay attention to the end of the bar and the start of the neighbouring low area. In other words, look for the transition zone between shallow and deeper.
But "the last third" and "the first third" are not a guaranteed measure, and they do not mean a set distance in metres. The edge may run parallel to the beach, or it may be slanted or broken. What matters is where the bottom changes, not the number of the third itself.
Test the edge instead of just guessing it
- Start with a moderate cast: aim at the area you think is near the transition between the two levels.
- Watch how your tackle settles: does the sinker stay put? Does the line keep drifting? Does the bait come back intact or tampered with?
- Change one factor: try a shorter or longer distance, or a different angle, keeping the other choices as similar as you can.
- Repeat what gave a sign: if you see a nibble or the bait is picked at within a certain range, test it again before moving around randomly.
Gently dragging the sinker may give an experienced angler a feel for a change in the resistance of the bottom, but it is not an accurate way to measure depth. Avoid dragging your rig over rocks or delicate weed, and do not yank hard when snagged.
5. Why are edges worth fishing?
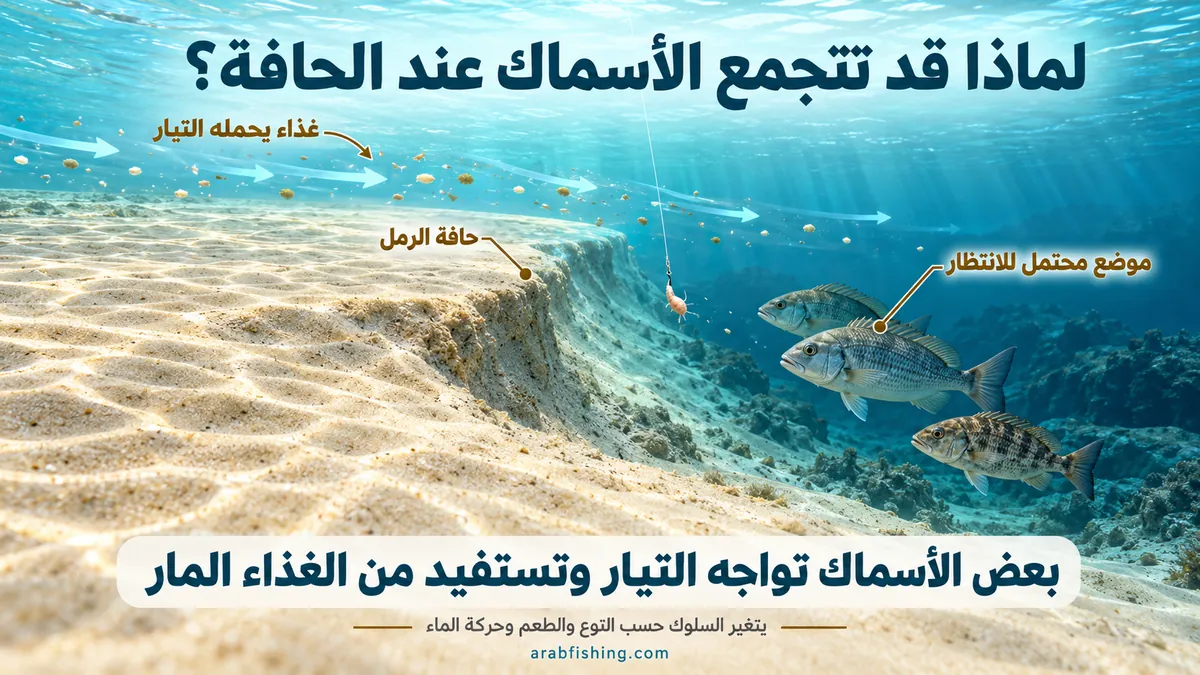
A fish looks for food, and is affected by safety, water movement and the nature of the place. When the bottom changes, the speed of the water or the path of what it carries may change too. That is why edges and channels can be passing or feeding points for some species.
Some fish face the current and pick up food that passes in front of them. Others move in schools over the bottom, hunt small creatures in the sand, or chase prey in open water. So it is not right to say that all fish always swim against the current, or that they only feed at the drop-off.
The practical benefit is simple: the edge gives you a logical reason to test, and the result on the water tells you whether to stay or change your choice. A suitable bottom shape alone is not enough if the fish are not there or not active, or if the bait does not suit them.
6. Set up your tackle to serve the spot you chose
Once you have chosen your casting range, the job of the tackle is to keep the bait there in a suitable way. Use a weight that suits the water movement and the bottom, within the limits of the rod and line. A sinker shape that grips sand can help in some conditions, but becomes a nuisance if the bottom is full of rocks and snags.
After the cast, take up the slack gently until contact with the tackle is clear, without constant tension that drags the sinker away from its spot. If waves affect a large part of the line, raising the rod may reduce its contact with the waves; in strong wind, a lower angle may give better control. Test the position that holds the tackle in place and lets you see the bite.
There is no single rig for every fish and every beach. Choose the hook size, bait and leader length according to the species you are targeting, how tangled the bottom is, and how you present the bait near the bottom. A well-secured bait that suits the hook is better than a large piece that curls up and covers the whole head.
7. When should you re-evaluate the spot?
A spot that was right when you arrived may change during the session. A rising or falling tide changes the distance to the edge and the depth of water over the bar, and the direction of the current or its effect on the line may change. Do not treat your first cast as the final decision for the rest of the day.
If you notice a clear change in how the line moves, or the bites disappear from a range that was active, review your casting distance, the bait and the angle you stand at. Low-light hours may suit some species, but there is no single time that guarantees the best fishing on every beach. Tie your notes to the species, the place and local conditions.
On Gulf and Kuwaiti beaches, pay special attention to local tide times and water movement; on beaches exposed to waves, watch the breaking lines and channels too. The general idea is the same, but the shape of the bottom, the species and the conditions differ from place to place.
8. A simple plan for your first visit to a new beach
- Start from dry land: make sure your spot is safe, that fishing is allowed, and that you have room to cast away from others.
- Watch before you rig up: look for changes in the shoreline, wave lines and foam paths. Pick two or three candidate areas rather than one certain point.
- Pick the edge that is easiest to reach by cast: do not start with the farthest just because it is farthest.
- Present a suitable bait and watch it: check it regularly, especially if it is being eaten without a clear bite.
- Test gradually: change the distance, then the angle, and do not change everything in the same cast.
- Write down what happened: the time of the visit, the state of the water, the wind, the bait, and the casting range that gave activity. These notes build your experience of the beach.
9. Mistakes to avoid from day one
- Judging by colour alone: dark colour may be weed or shadow, not extra depth.
- Applying wind direction mechanically: left and right alone do not tell you where the bait will do better.
- Treating thirds as a law: use them to understand the edge, then test the real spot.
- Casting over the productive spot: try the closer range if you saw signs worth attention there.
- Insisting after losing control: drifting tackle and repeated tangles may call for a change of position.
- Taking calm water as proof of safety: a quiet gap between waves may hold a rip current.
Questions beginners ask
Is the trough always better than the bar?
No. Some fish feed over the shallows or pass along the channel, and may use the edge between them. Try according to the signs and the activity you see.
If the sea is perfectly calm, can I tell the depth?
You can collect clues from colour, the visible bottom and your knowledge of the spot from earlier visits, but looking alone does not give an accurate measurement. When the signs are missing, make organised testing the basis of your choice.
Should I stand with my back to the wind or go with the current?
Stand where you can cast safely and control your tackle, then choose an angle that gets the bait to the candidate area. Watch the water movement and the line instead of relying only on a description of the wind.
Does raising the rod stop all wave effect?
It may reduce some of it, but it does not remove the effect of current or wind. Try the rod angle and a suitable weight without exceeding what your tackle can handle.
One last tip before the first cast
Give the sea time to understand it. Look for a difference in the bottom, then watch how the water moves over it, and present the bait within a range you can control. After that, let experience lead you: observe, change one thing, and repeat what gave a result. Every visit made this way adds to your experience, even on days you go home without fish.
The drawings are educational, not depth charts or forecasts of guaranteed fishing, and were created with the help of AI. The photographs are illustrative and are not used to prove a particular species or place.
References for understanding water movement and beach safety: US National Weather Service: rip current science · Rip current FAQs